 MotionLab
What Is the Correct Wrist Position for Typing?
MotionLab Editorial · 12 min read · Education
Keep your wrists straight and in line with your forearms, hands at or just below elbow height, floating as you type. Fix keyboard tilt, wrist rests, and mouse. Put the keyboard directly in front of you with your elbows close to your sides, bent about 90°, and your hands at or slightly below elbow height (Mayo Clinic) Let your hands float while you type; if you use a wrist or palm rest, touch it with the heel of your palm during pauses, not the wrist
Key Takeaways
- ✓Keep your wrists straight and in line with your forearms, not bent up, down, or toward the little finger (OSHA, CCOHS)
- ✓Put the keyboard directly in front of you with your elbows close to your sides, bent about 90°, and your hands at or slightly below elbow height (Mayo Clinic)
- ✓Let your hands float while you type; if you use a wrist or palm rest, touch it with the heel of your palm during pauses, not the wrist
- ✓Fold away keyboard feet that bend your wrists up, keep the mouse right beside the keyboard, and take regular breaks from long typing blocks
What Is the Correct Wrist Position for Typing?
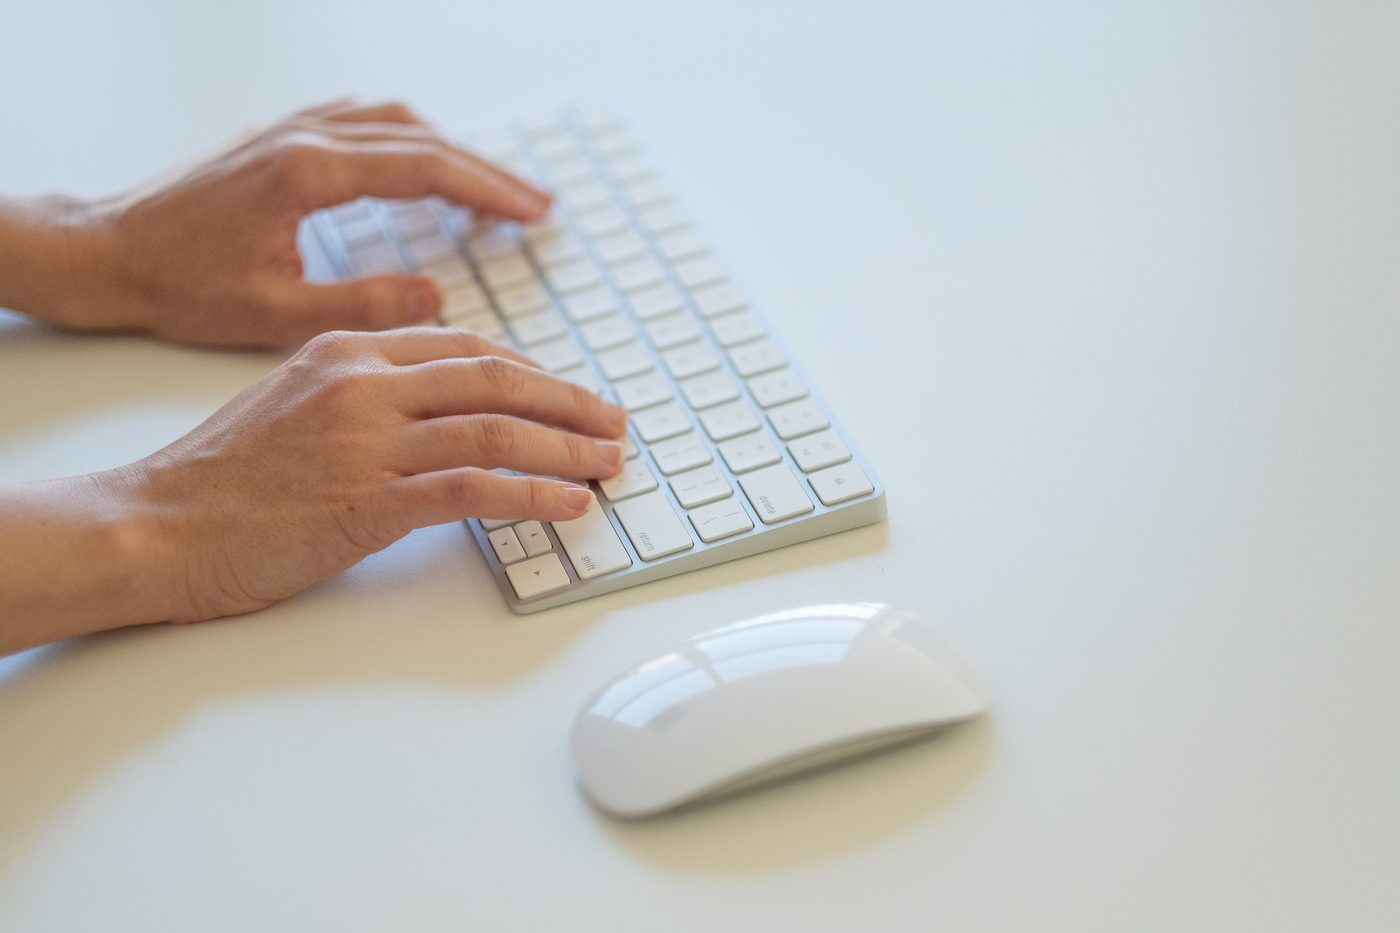
The correct wrist position for typing is neutral: wrists straight and in line with your forearms, hands at or slightly below elbow height, elbows close to your sides and bent about 90°, with the hands floating over the keys rather than resting on the desk.
If your wrists ache after a long writing day, or you notice a red line where they press into the desk edge, the problem is rarely the keyboard alone. It is usually the angle your wrists sit at for thousands of keystrokes. So what is the correct wrist position for typing, and how do you get there with the desk and chair you already have?
OSHA’s keyboard guidance sums it up in three lines: put the keyboard directly in front of you, keep your shoulders relaxed and elbows close to your body, and keep your wrists straight and in line with your forearms. CCOHS keyboard guidance defines neutral the same way: the wrist is aligned straight with the forearm, not bent or extended in any direction. Mayo Clinic’s office ergonomics guide adds the height cue: hands at or slightly below the level of your elbows.
The rest of this guide turns that into a setup you can check in a few minutes, plus fixes for keyboard tilt, wrist rests, the mouse, and laptops.
Why Does Wrist Position Matter When You Type?
Typing is light work done a huge number of times. OSHA notes that a proficient typist can easily make more than 18,000 keystrokes an hour, often with the same posture for a whole shift. Small angles add up at that volume.
The tendons that move your fingers run through the wrist, including the narrow carpal tunnel. OSHA explains that when the wrist is bent, those tendons and their sheaths have to slide around the bones of the wrist instead of running straight. Over time that can irritate them, and swelling in tight spaces like the carpal tunnel can press on nerves and blood vessels. Tingling, numbness, and tendon pain are the symptoms OSHA links to these awkward postures.
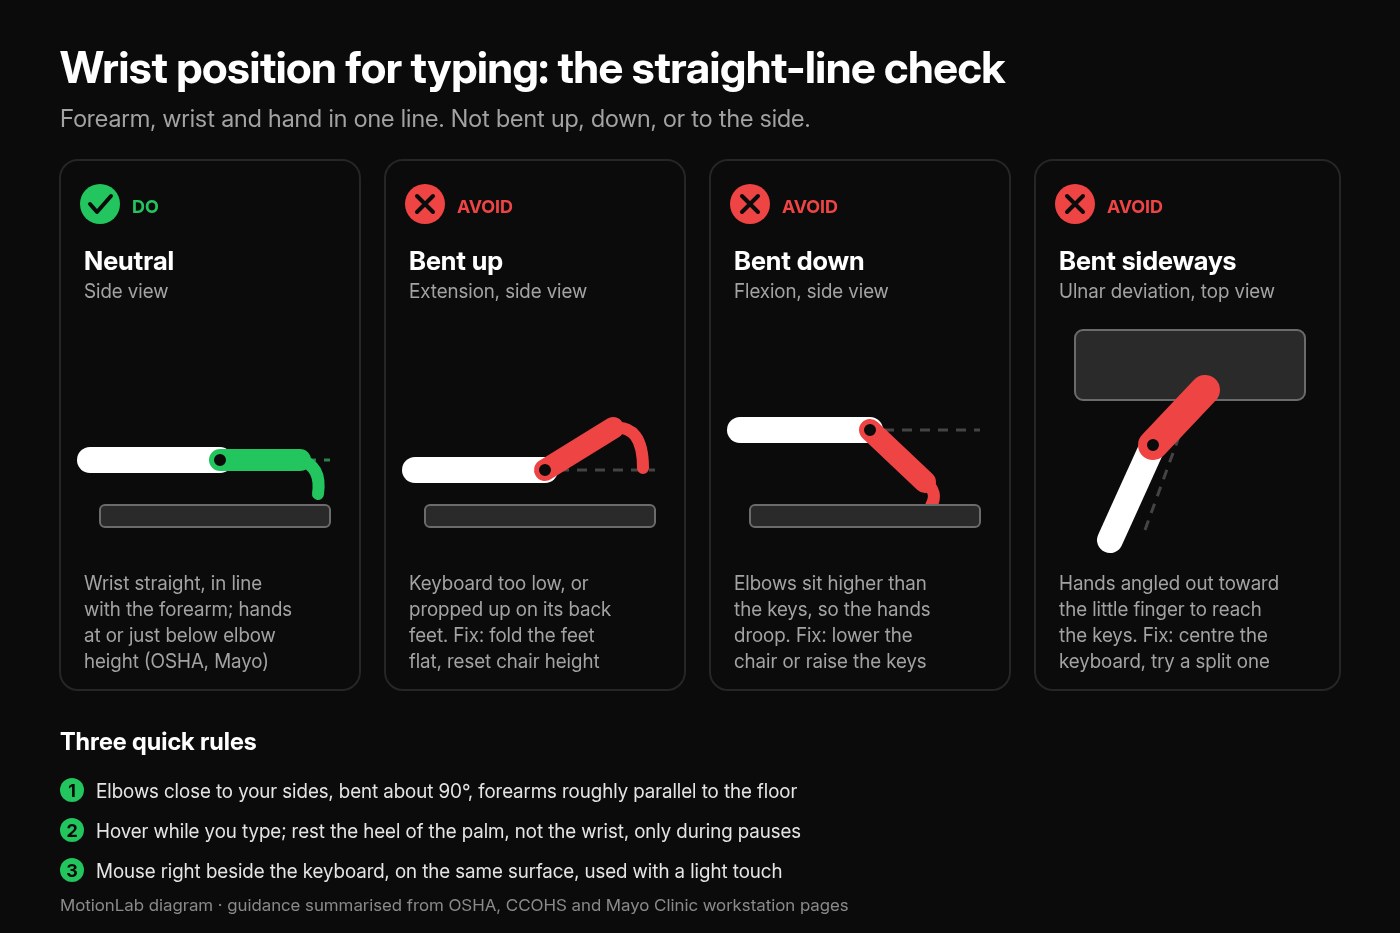
There are three ways a wrist usually leaves neutral at the keyboard:
- Bent up (extension): the wrist sits low and the hand angles up to the keys. OSHA links this to keyboards that are too low or tilted up on their back feet.
- Bent down (flexion): the hand droops over the keys, common when your elbows sit higher than the keyboard.
- Bent sideways (ulnar deviation): the hands angle out toward the little finger so they can reach the keys on a standard keyboard.
There is also contact stress. Resting the wrists or forearms on a hard desk edge or a sharp-edged wrist rest presses on soft tissue and nerves. OSHA compares the tingling to hitting your “funny bone.”
How Do You Set Up a Neutral Wrist Position?
Set your chair first, then bring the keyboard to elbow height, flatten any tilt that bends your wrists, and keep the mouse close. Work through it in this order so you are not chasing conflicting heights.
1. Set your chair height first
Sit back with your feet flat on the floor, or on a footrest, and your thighs roughly parallel to the floor, as Mayo Clinic describes. Everything else is measured from here.
2. Bring the keyboard to elbow height
Let your shoulders drop and your upper arms hang by your sides. Bend your elbows to about 90°; CCOHS gives a range of 90–110°. Your forearms should be roughly parallel to the floor and your hands at or slightly below your elbows.
3. Centre the keyboard and keep it close
Put it directly in front of you, centred on your body and the screen, not off to one side. CCOHS suggests keeping the keyboard near the front of the desk, about 5 cm (2 inches) back from the edge, so your elbows can stay by your sides.
4. Check the tilt
If your wrists bend up, fold away the feet at the back of the keyboard. OSHA says not to use keyboard feet if they increase wrist bending. Some people do better with the keyboard flat or tilted slightly away from them.
5. Float your hands while typing
Move your whole hand to reach keys instead of anchoring the wrist and stretching the fingers. Rest only during pauses, and then on the heel of your palm, not the wrist.
6. Bring the mouse in close
Put it on the same surface, right beside the keyboard, so your elbow stays by your side when you switch. Use a light grip.
7. Check from the side
Ask someone to take a quick photo, or glance at your reflection. You want a roughly straight line from elbow to knuckles. If you see a kink at the wrist, adjust the chair, keyboard height, or tilt and check again.
Quick self-check
with your fingers on the home row, you should be able to lift your hands slightly without moving your shoulders. If your wrists are carrying weight on the desk, or your shoulders rise when you type, the height is wrong.
Should Your Keyboard Be Tilted Up or Flat?
Usually flat, or tilted slightly away from you, rather than propped up on its back feet. Most keyboards ship with little feet that raise the back edge. They feel natural, but OSHA notes that tilt from extending the legs on the back of the keyboard can bend the wrist upward.
The tilt that helps depends on where your hands sit relative to the keys:
- Sitting low relative to the keyboard? OSHA says slightly raising the back may help keep the wrist straight.
- Keyboard lower than your elbows, for example on a keyboard tray? Raising the front edge, a slight negative tilt, may help.
- Feet making the bend worse? Fold them away. That is OSHA’s rule.
Cornell University’s ergonomics group goes further. It describes the ideal typing posture as a keyboard slightly below seated elbow height with the base gently sloped away from you, so your hands reach the keys in a neutral position and your arms, shoulders, and neck can relax. Cornell also points out that on a regular desktop, forearms tend to sag as they tire, which pushes the wrists into more extension. It adds that studies have failed to show conventional keyboard trays substantially improve wrist posture, so a tray is not an automatic fix.
If you do not have a tray, the practical version is simple: fold the feet away, set chair and desk height so your hands sit at or just below your elbows, and check your wrists from the side.
Should You Use a Wrist Rest?
A wrist rest can help, as long as you use it for pauses, not while you are actively typing. OSHA says opinions on wrist and palm supports vary, but proper use has been shown to reduce muscle activity and help keep wrist angles neutral. It also warns that resting your wrist on a support while typing can restrict wrist movement and make awkward postures worse.
OSHA’s wrist and palm support guidance gives the rules:
- While typing, your hands should move freely and stay above the rest.
- While pausing, the pad should touch the heel or palm of your hand, not your wrist.
- Match the height of the rest to the front edge of the keyboard so it does not push your wrists up.
- Choose soft and rounded, at least 1.5 inches (3.8 cm) deep, without hard or sharp edges.
- Fix the rest of the setup first. Chair, desk, and keyboard height do more for wrist posture than any pad.
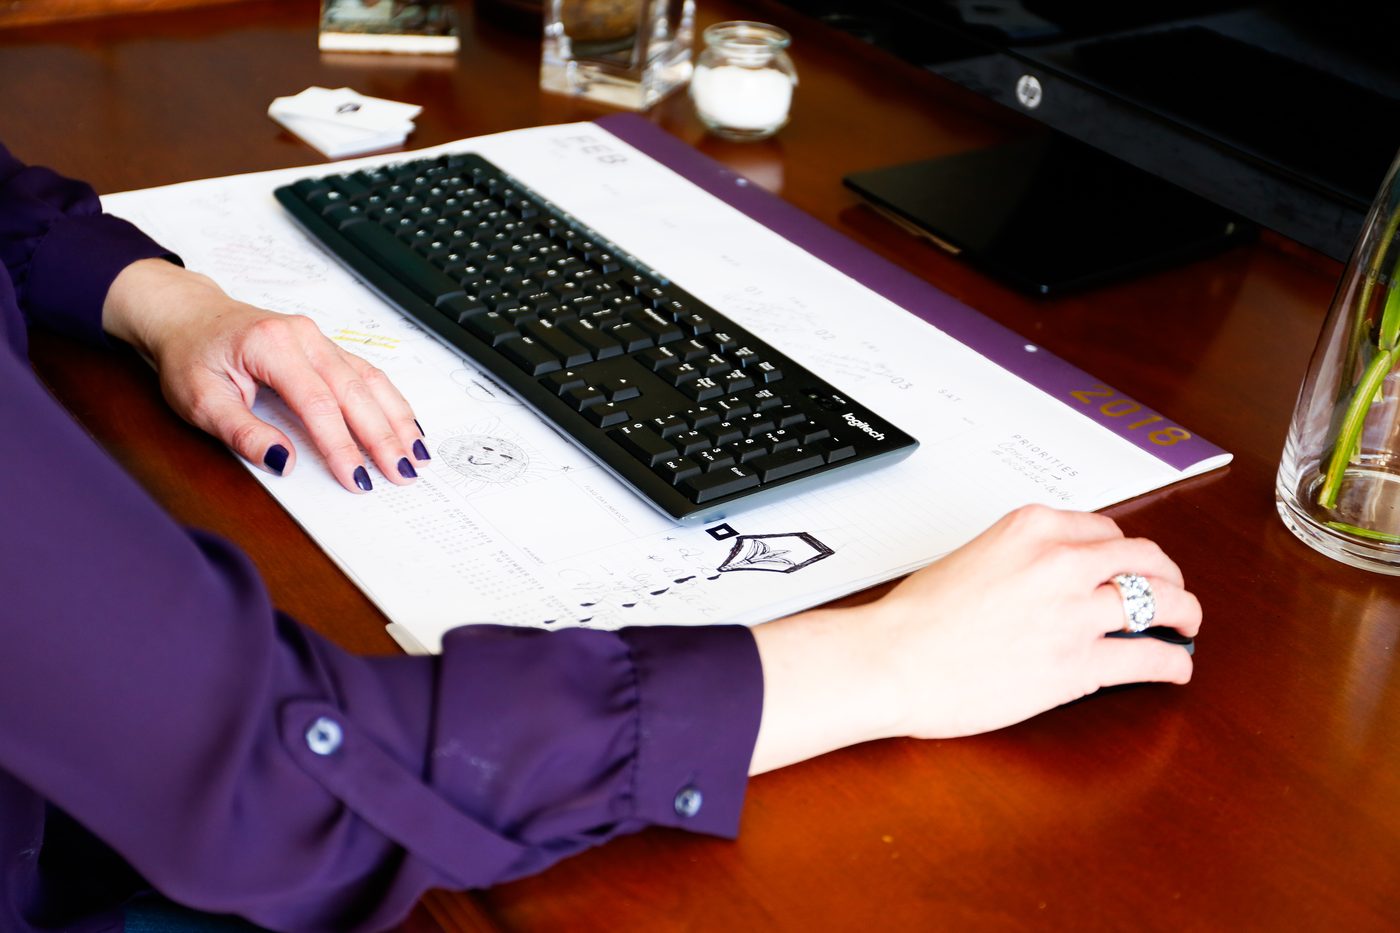
What you should avoid is resting your wrists on the bare desk. CCOHS says not to, because the pressure may contribute to contact stress injuries. If your desk has a hard, square edge, Mayo Clinic suggests padding it or using a wrist rest.
How Should Your Wrist Sit on the Mouse?
The mouse follows the same rule as the keyboard: wrist straight, elbow by your side, light touch. Many people get the keyboard right and then reach out to a mouse parked at the far corner of the desk. OSHA notes that reaching for the mouse pulls the elbow away from the body and loads the shoulder.

From OSHA’s pointer and mouse guidance and Mayo Clinic:
- Same surface, right beside the keyboard. A keyboard without a number pad frees up room so the mouse can sit closer.
- Move from the elbow, not by bending the wrist side to side to steer.
- Set the pointer speed so you can cover the whole screen while your wrist stays straight, and so you can control it with a light touch.
- Don’t grip tightly. A death grip keeps the forearm muscles working the whole time.
- Pick a size that fits your hand. A mouse that is too big or too small makes you bend the wrist and press harder.
- Use keyboard shortcuts for repetitive actions, and if you can, switch hands now and then. OSHA lists both as ways to cut mouse load.
What Is the Right Wrist Position for Typing on a Laptop?
The same neutral wrist, which is hard to get on a laptop alone. OSHA notes that smaller keyboards, like those on laptops, can contribute to stressful postures. The deeper problem is that the keyboard and screen are joined. Put the screen high enough for your neck and the keys end up too high for your wrists; put the keys at elbow height and you look down at the screen.

Mayo Clinic’s fix is the standard one: if you work on a laptop at a desk, add an external keyboard and mouse and raise the laptop on a stand, so it works like a desktop. For short sessions on the laptop’s own keyboard:
- Sit so the keyboard is at or just below elbow height, not up on a high table
- Keep your wrists off the sharp front edge, and float your hands
- Don’t type with the laptop on your lap for long; the wrists usually bend down
- Take more frequent breaks than you would at a full setup
For the full layout, see how to set up a laptop for desk work.
Do Ergonomic or Split Keyboards Help Your Wrists?
They can help some people reach a neutral posture, but they are not a cure. CCOHS says there is no universally agreed best keyboard, and recommends trying different models to find one that keeps your wrists neutral. OSHA adds that alternative keyboards help maintain neutral wrist postures, but available research does not provide conclusive evidence that they prevent discomfort and injury, and that people may need time to get used to them.
Where a different keyboard can make sense, according to CCOHS:
- Split keyboard: if you have a broad chest, or your wrists angle out toward the little finger (ulnar deviation). Splitting the halves lets your hands point straight ahead without squeezing your elbows in.
- Shorter keyboard (about 35.6 cm or 14 inches instead of 45.7 cm or 18 inches): less reaching, and the mouse can sit closer.
- Tented keyboard: raises the middle so your palms face slightly inward; CCOHS suggests it for some arm tendon conditions.
- Light key action: you should not need to hammer the keys. Pressing hard all day adds force on top of repetition.
Try the free fixes first: chair height, keyboard height, folded feet, and a closer mouse. If your wrists still angle sideways on a standard keyboard, a split or compact layout is a reasonable next step.
What Mistakes Bend Your Wrists Without You Noticing?
- Typing with the keyboard feet up because that is how it came out of the box.
- Resting the wrists on the desk edge and stretching the fingers to reach keys.
- Leaning on a wrist rest while typing instead of only during pauses.
- Keyboard too far back on the desk, so you reach forward and your elbows leave your sides.
- Chair too low for the desk, so the keys sit above your elbows and your wrists bend up, or your shoulders shrug.
- Mouse parked out at the corner, far from the keyboard.
- Gripping the mouse hard or using a pointer speed that is too slow, so you swing the wrist a long way.
- Working on a laptop on the sofa for hours.
- Setting it once and never rechecking. A new chair, desk, keyboard, or a switch to a standing desk means your elbow height has changed.
How Often Should You Take a Break From Typing?
Even a perfect wrist position is still the same position held for hours. OSHA recommends building frequent short pauses into computer work and suggests that every hour, you take a five-minute break from computer tasks: look away, stretch, get up, or walk. Mayo Clinic also suggests stretching your hands, fingers, and arms from time to time while seated.
Practical ways to fit it in:
- Change tasks: mix in calls, reading, or a walk to the printer between long typing blocks
- Pair a cue with a break: stand up when you send an email or finish a document
- Shake out and open the hands: spread the fingers wide, make a loose fist, roll the shoulders
- Walk: a short walk does more than a stretch alone; see how often to take a walking break from sitting
For targeted forearm and wrist work, use the wrist stretches guide, and the desk stretches set for the neck, upper back, and hips that long typing sessions also load. If you would rather have that part planned, MotionLab builds guided mobility sessions of 7, 15, or 25 minutes around your restrictions, using AI powered by Gemini. MotionLab is live on the web and Android; start at /signup when you’re ready.
When Should Wrist Pain Get Professional Care?
This article is educational, not a diagnosis. Adjusting your keyboard, mouse, and breaks is reasonable when discomfort is mild, clearly linked to typing, and eases when you rest or change your setup.
See a doctor or physiotherapist if you have:
- Numbness, tingling, or pins and needles in your fingers that keeps coming back or doesn’t go away
- Weakness in your hand, dropping things, or trouble with fine tasks like buttons
- Pain or tingling that wakes you at night
- Swelling, warmth, or a visible lump at the wrist
- Pain after a fall or injury
- Symptoms that keep getting worse despite a sensible setup and regular breaks
Early assessment is easier to act on than months of working through it.
What Is the Correct Wrist Position for Typing? FAQ
What is the correct wrist position for typing?
Neutral: wrists straight and in line with your forearms, not bent up, down, or sideways. Keep your hands at or slightly below elbow height, your elbows close to your sides at about 90°, and your hands floating over the keys.
Should my wrists rest on the desk when I type?
No. CCOHS advises against resting your wrists on the desk because the pressure may contribute to contact stress injuries. Float your hands while typing and rest only during pauses.
Should I type with my wrists up or down?
Neither. Aim for straight. Wrists bent up usually mean the keyboard is too low or tilted up on its feet; wrists bent down usually mean your elbows sit higher than the keys.
Should my keyboard be flat or tilted?
Usually flat or tilted slightly away from you. OSHA says not to use the keyboard’s back feet if they increase wrist bending, and Cornell describes a gentle slope away from you, with the keyboard slightly below elbow height, as the ideal.
Are wrist rests good or bad?
They can help if you use them correctly. OSHA says your hands should float above the rest while you type, and the heel or palm of your hand, not your wrist, should touch it during pauses. Choose a soft, rounded rest that matches the keyboard’s height.
How high should my keyboard be?
At about elbow height with your shoulders relaxed, so your hands sit at or slightly below your elbows. At a standing desk the same rule applies; see how high should a standing desk be.
Do ergonomic keyboards prevent wrist pain?
They can make a neutral wrist easier, especially split keyboards for wrists that angle sideways, but OSHA notes research does not conclusively show they prevent discomfort or injury. Fix height, tilt, and mouse position first.
Sources
Related reading
Put it into practice
Ready to apply what you've learned?
MotionLab builds personalised mobility sessions around your specific restrictions — so every minute you invest targets what you actually need.
Start a session on MotionLab →